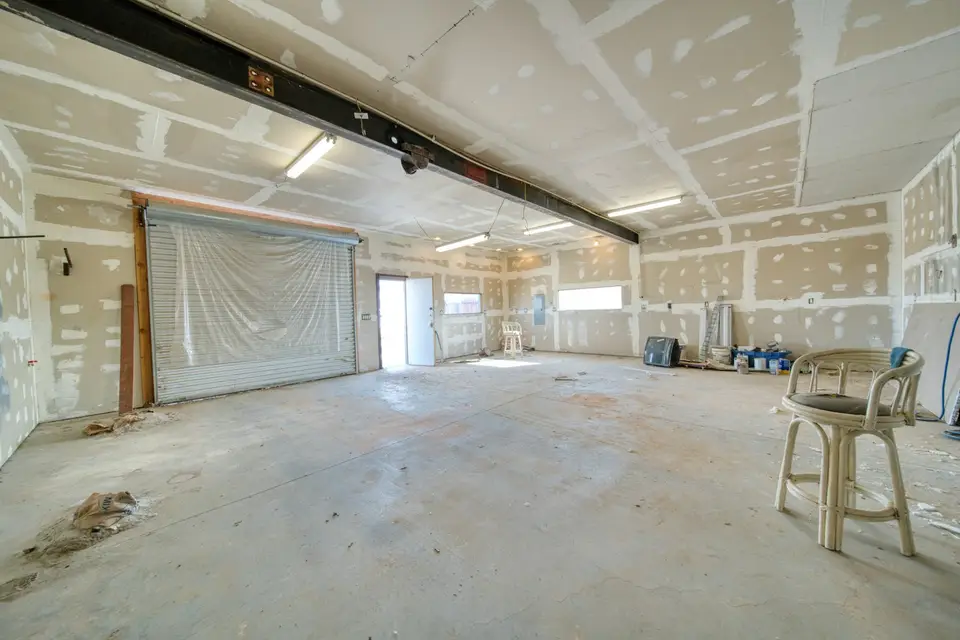
Drywall Taping & Finishing in Milford: what's different here
Finishing drywall in Milford means working with the New England weather: compound dries slowly in cold winters and in humid summer basements, especially near Charles River. We control heat and humidity between coats on every Milford job, from Downtown Milford (Main Street) and Prospect Heights to the rest of Worcester County, so seams do not ridge or crack later.
About 64% of homes were built before 1980 and 23% before 1940; median year built 1971 (ACS 2020-2024 5-year). Milford homes from around 1971 often have orange peel or hand textures from the 1970s–80s. We can match them on repairs or skim them smooth, and we recommend asbestos testing before sanding pre-1980s compound.
Milford is known for Milford pink granite, quarried from 1870 until about 1940 and used in the Boston Public Library and the original Pennsylvania Station in New York.
The Prospect Heights Historic District is an early-20th-century planned neighborhood of company housing laid out by the Draper Company for its workers.
Signs you need this service
- Board is hung and needs to be taped, mudded and sanded
- Seams, screw heads or tape lines show through the paint
- Walls look wavy or patchy under window light or wall sconces
- You plan semi-gloss, eggshell or a dark color on new walls
- Old walls are rough, patched or torn and need a skim coat
- You want a texture added, removed or matched
What are the levels of drywall finish?
The Gypsum Association’s GA-214 defines six levels of drywall finish, from Level 0 (no taping) to Level 5 (taped, three coats and a skim coat over the whole surface). Each level adds compound work. Level 4 is the usual standard for painted homes, and Level 5 is recommended for glossy paint, dark colors and harsh side lighting.
The full definitions are in GA-214, a free Gypsum Association document that most US drywall specifications reference. Writing the level into your estimate is the simplest way to avoid an argument about what “finished” means.
- Level 0: no taping or finishing. Temporary construction only.
- Level 1: tape set in compound at joints and inside corners. Attics, above ceilings and other hidden areas.
- Level 2: tape set and wiped with a coat of compound, one coat on fasteners. Garages, storage and as a base under tile.
- Level 3: one more coat on joints and fasteners. Under heavy textures or heavy wallcovering.
- Level 4: two coats over flat joints, one over inside corners, three on fasteners. Flat paint, light texture, wallpaper.
- Level 5: Level 4 plus a thin skim coat over the entire surface. Gloss and semi-gloss paint, dark colors and critical lighting.
Do I need a Level 4 or a Level 5 drywall finish?
Choose Level 4 for most rooms painted in flat or matte finishes with ordinary lighting. Choose Level 5 when you will use eggshell, satin or semi-gloss paint, a dark color, or when long windows, sconces or recessed lights skim across the wall. Level 5 adds a full skim coat, which hides the difference between paper and compound.
The problem Level 5 solves is called photographing or flashing: the paper face and the joint compound absorb paint differently, so seams show as dull or shiny stripes. Sun coming low through a south-facing window, a two-story foyer or a long hallway with ceiling cans makes it worse. National Gypsum and other manufacturers recommend Level 5 for these “critical lighting” conditions.
Level 5 costs more because it is an extra full coat plus sanding over every square foot. In a typical home we often finish most rooms to Level 4 and upgrade only the ceilings, foyers and walls that face big windows. Your interior painting choice should drive that decision.
What is skim coating and when is it worth it?
Skim coating is troweling or rolling a thin layer of joint compound over an entire wall or ceiling, then sanding it smooth. It is worth it to reach a Level 5 finish, to hide torn paper and old patches, to smooth a removed texture, or to give a tired, uneven wall a new surface without replacing the drywall.
On walls that were wallpapered, we seal any torn brown paper with an oil-based or shellac primer first, otherwise the water in the compound makes it bubble. A skim usually takes one or two coats, each sanded, and then a drywall primer before paint.
Skim coating is also how we finish a ceiling after popcorn ceiling removal and how we bring a heavily patched wall back to one even surface. On plaster walls the approach is similar, but bonding and crack treatment are different.
Why can I see drywall seams through my paint?
Seams usually show through paint because the joints were not feathered wide enough, the tape was not fully bedded, the compound was not dry before the next coat, or the wall was painted without a proper primer. Strong side light then exaggerates every ridge. The fix is to sand, refeather the joints or skim the wall, prime and repaint.
Ridging along a seam that appears months later can also come from compound applied in a cold or very humid space, or from board installed over damp framing. We keep the room within the compound manufacturer’s temperature range, run dehumidifiers in summer, and do not stack coats on compound that is still soft.
Not every visible seam is a finishing defect. A crack that opens along the same joint each winter is movement, and that is a repair job, not just more mud.
Which drywall texture is right: smooth, orange peel or knockdown?
Smooth walls (Level 4 or 5) are standard in most Massachusetts homes and look cleanest with modern paint. Orange peel, a fine sprayed texture, hides minor flaws and is common in 1980s–2000s builds. Knockdown is heavier and hides more. Textures are harder to patch invisibly, so most of our clients choose smooth on new work.
- Smooth: best for satin or semi-gloss paint, easiest to repaint and repair.
- Orange peel: fine spray, forgiving on walls with minor waves.
- Knockdown: sprayed splatter flattened with a knife; hides more, harder to match.
- Skip trowel or hand textures: decorative, applied by hand; each crew’s pattern is a little different.
How the job works, step by step
- Agree on the finish levelWe confirm the GA-214 level in writing, Level 4 or Level 5, based on your paint sheen, color and lighting, so you know exactly what you are paying for.
- Prep and protectFloors, windows and fixtures are covered, loose paper is cut and sealed, and fastener heads are checked so none sit proud of the surface.
- Tape coatPaper tape is bedded in setting-type compound on flat seams and inside corners; corner bead is set straight on outside corners.
- Fill and finish coatsTwo more coats, each wider than the last, feather the joints out to 10 to 14 inches, with drying time between coats.
- Skim coat when specifiedFor Level 5, a thin coat of compound or a skim product goes over the entire surface to even out paper and mud texture.
- Sanding with dust controlFine-grit sanding with vacuum-connected sanders, checked with a raking work light from several angles.
- PrimeA drywall primer or high-build primer seals the paper and compound to the same porosity so the paint does not flash.
What it costs in Massachusetts
These are national typical ranges reported by HomeGuide (2026) for finishing labor and materials; Massachusetts labor often runs at or above the national average. Your price is set after a free on-site estimate.
| Job | Typical MA range |
|---|---|
| Tape and mud only, per sq ft of board | $0.35–$1.10/sq ft |
| Full finish to Level 5, including skim coat | $1.75–$3.50/sq ft |
| Skim coat, walls | $1.00–$1.30/sq ft |
| Skim coat, ceilings | $1.00–$1.50/sq ft |
| Skim walls and ceiling of a 12x12 room | $580–$800 |
Source: HomeGuide — Cost to tape, mud and finish drywall